According to kubernetes.io, Kubernetes, also known as K8s, is an open-source system for automating deployment, scaling and management of containerized applications
Kubernetes is the defacto container orchestration platform today. It is a powerful tool that can help you manage your applications more efficiently and reliably. Kubernetes uses a declarative approach to configuration, which means that you define the desired state of your application and Kubernetes will work to make sure that the actual state matches the desired state. This makes it easy to deploy changes to your applications and to scale your applications up or down as needed.
However, managing kubernetes can be a nightmare. It has a steep learning curve and has a lot of features, which can take some time to master. While there is the official kubernetes dashboard, in my opinion Rancher by Suse, is the preferred tool for most administrators. The real power of Rancher is in its ability to manage multiple kubernetes clusters, while providing a single pane of glass for all administrative tasks.
While I have used Rancher to manage kubernetes cluster at work, I haven’t really set it up myself. So this weekend, I set out to change that with a goal of setting up rancher and use it to manage multiple kubernetes clusters. I did not want to set it up in a public cloud provider, as kubernetes clusters dont come cheap. So all of it has to run as docker containers on my laptop - Lenovo Ideapad 3 - a Core-i3 11th gen machine with 16gb of RAM. And did I say that my operating system is Windows!. That would be an added dimension in this challenge.
Thankfully, there is a docker image available for Rancher. As for the kubernetes cluster, there are several options. There is the trusty minikube, there is also microk8s from Canonical but I ended up choosing k3s, specifically the k3d distribution which runs k3s in docker. k3s is as close to a production cluster you can get on a laptop. You can run multiple masters and nodes, you can have proper etcd and pod networking, a proper DNS discovery service and it also comes with traefik ingress controller out of the box. Its also important to note that the rancher docker image comes with a local k3s cluster out of the box - which will act as the 2nd cluster to satisy our goal of managing multiple clusters.
First things first, we need a isolated docker network to run both rancher and the k3d cluster. Now I could have used one of the default bridge networks that docker creates, but I was reading on the internet that several people ran into problems. So I created a new docker network using the following commands
$> docker network create kubenet
9ae07d71e99e....

$> docker network ls
NETWORK ID     NAME      DRIVER    SCOPE
c7ad4626150b   bridge    bridge    local
a24869f480ea   host      host      local
9ae07d71e99e   kubenet   bridge    local
d1f3b5444d49   none      null      local
Next we need to install rancher and use the network that we created above. The rancher docs has various options listed and I ended up choosing the one with the default rancher generated certificate
$> docker run -d --rm --privileged --name rancher.docker.internal --network kubenet -p 443:443 rancher/rancher:latest
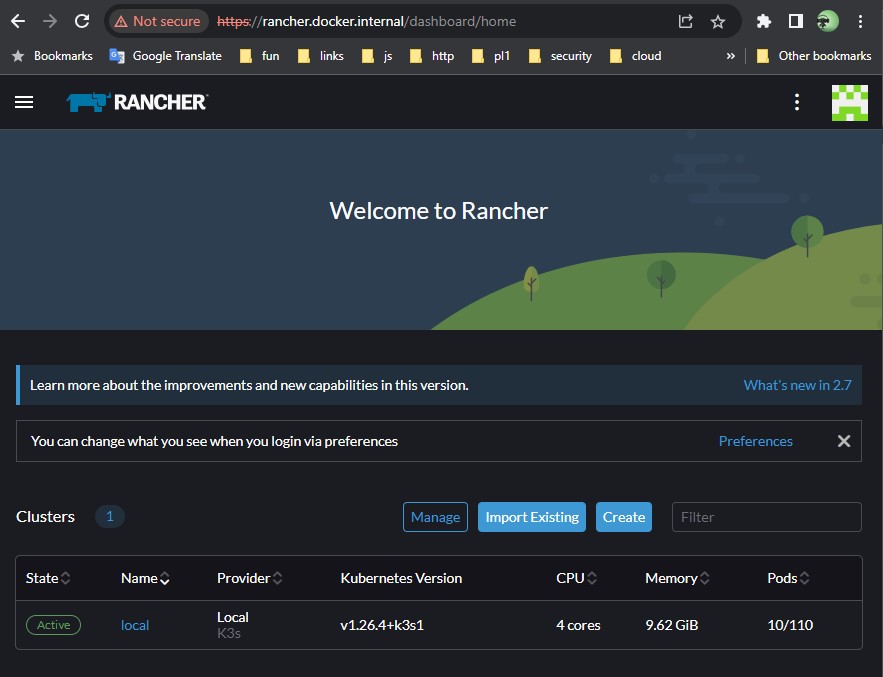
After having set a etc/hosts file entry for rancher.docker.internal to point to 127.0.0.1, I opened up https://rancher.docker.internal/. After accepting the security risk of unknown certificate and then finding the bootstrap password from the container logs and then setting a new admin password - here I was looking at the rancher dashboard and I already had my “local” kubernetes cluster up and running.

Now to setup our k3d cluster. There are several ways to install k3d on your machine. On Windows, the easiest was to use the chocolatey choco install k3d
The default create cluster command on k3d sets up a single node k3s cluster. My aim was to get as close to production like environment as possible. That meant, we needed to set some important flags while creating the cluster.
$> k3d cluster create mykube --agents 2 --servers 3 -p "8081:80@loadbalancer" --volume /k3d-storage:/var/lib/rancher/k3s/storage@all --network kubenet
The above command sets up a k3d cluster with 3 masters and 2 nodes. You need to choose more than 1 master for proper etcd and pod networking to be setup. The port-mapping construct 8081:80@loadbalancer means: “map port 8081 from the host to port 80 on the container which matches the nodefilter loadbalancer“. The loadbalancer nodefilter matches only the serverlb (a separate container) that’s deployed in front of a cluster’s server nodes and all ports exposed on the serverlb will be proxied to the same ports on all server nodes in the cluster. The volume construct –volume /k3d-storage:/var/lib/rancher/k3s/storage@all instructs the local-path-provisioner to use a fs on the host for storage. And finally, the –network construct instructs the cluster to use the same docker network that we created before.
We can confirm that the cluster is up and running using the following command
$> kubectl cluster-info
Kubernetes control plane is running at https://host.docker.internal:51667
CoreDNS is running at https://host.docker.internal:51667/api/v1/namespaces/kube-system/services/kube-dns:dns/proxy
Metrics-server is running at https://host.docker.internal:51667/api/v1/namespaces/kube-system/services/https:metrics-server:https/proxy
Before we try to manage this cluster in rancher, lets make sure that the rancher server will be addressable from the new k3d cluster. This is required as rancher will install a cattle-agent on the k3d cluster for management and the cattle-agent needs to be able to talk to the rancher installation. The easiset way to confirm this is by checking the ip address of the rancher and confirm if the same is mapped into CoreDNS config map.
First, lets get the internal ip address of the rancher server
$> docker inspect -f '' rancher.docker.internal
172.18.0.2
Then lets get the CoreDNS configmap
$> kubectl get cm coredns -n kube-system -o yaml
apiVersion: v1
data:
Corefile: |
    .:53 {
        errors
        health
        ready
        kubernetes cluster.local in-addr.arpa ip6.arpa {
        pods insecure
        fallthrough in-addr.arpa ip6.arpa
        }
        hosts /etc/coredns/NodeHosts {
        ttl 60
        reload 15s
        fallthrough
        }
        prometheus :9153
        forward . /etc/resolv.conf
        cache 30
        loop
        reload
        loadbalance
    }
    import /etc/coredns/custom/*.server
NodeHosts: |
    192.168.65.254 host.k3d.internal
    172.18.0.9 k3d-mykube-serverlb
    172.18.0.4 k3d-mykube-server-0
    172.18.0.5 k3d-mykube-server-1
    172.18.0.6 k3d-mykube-server-2
    172.18.0.3 k3d-mykube-tools
    172.18.0.2 rancher.docker.internal
    172.18.0.7 k3d-mykube-agent-0
    172.18.0.8 k3d-mykube-agent-1
kind: ConfigMap
There is a whole bunch of information here, but the critical part is the NodeHosts array. Here we can confirm that the rancher.docker.internal is mapped to the correct internal ip address. Which means we are all set to add the cluster into rancher. The rancher dashboard gui has a easy to use option to import existing cluster and choose the type as ‘Generic’. I’ll name the cluster as mykube and accept the default options. I’ll now be presented with a list of kubectl apply options - choose the one which ignores the certificate errors and run the command.
$> curl --insecure -sfL https://rancher.docker.internal/v3/import/c7qxq9hq9rkrw2f6f4b4fnzqnrjl5t6tg5f7xq8xxfq6dphhrp9w5g_c-m-qv9qsxqd.yaml | kubectl apply -f -
clusterrole.rbac.authorization.k8s.io/proxy-clusterrole-kubeapiserver created
clusterrolebinding.rbac.authorization.k8s.io/proxy-role-binding-kubernetes-master created
namespace/cattle-system created
serviceaccount/cattle created
clusterrolebinding.rbac.authorization.k8s.io/cattle-admin-binding created
secret/cattle-credentials-34e859b created
clusterrole.rbac.authorization.k8s.io/cattle-admin created
Warning: spec.template.spec.affinity.nodeAffinity.requiredDuringSchedulingIgnoredDuringExecution.nodeSelectorTerms[0].matchExpressions[0].key: beta.kubernetes.io/os is deprecated since v1.14; use "kubernetes.io/os" instead
deployment.apps/cattle-cluster-agent created
service/cattle-cluster-agent created
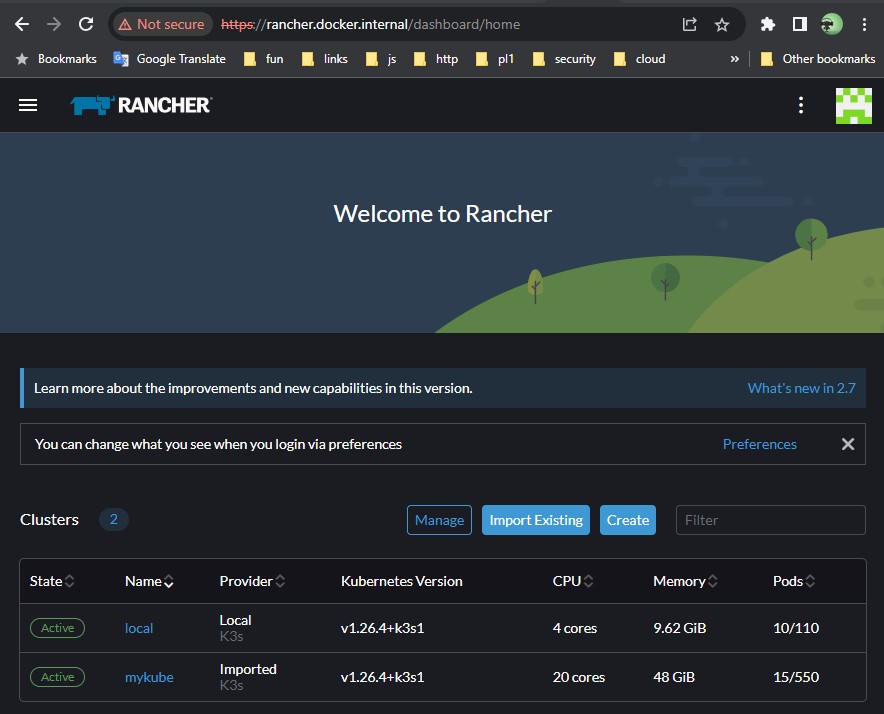
As you can see, rancher installs a bunch of tools in the cattle-system namespace to manage the newly added cluster. Give it a couple of minutes for all the pods to spin up and you should start seeing the new cluster on the rancher gui

Now you are all set to manage the cluster using rancher.
